Maya Exporter and Alpha Blending
In this assignment, we were intended to use Mesh/Objects created using Maya in our program. Using this we no more have to create mesh files manually. We used the custom plugin to get the vertex, index and color of the vertices and then formatted and wrote it to the human readable file of our custom format. Most of the exporter code was already given, all we have to do is to write it to the custom human readable mesh file. For achieving this we do have to set up some prior requirement. First setting Autodesk Maya 2016 directory and custom plugin location to an environment variables - MAYA_LOCATION and MAYA_PLUG_IN_PATH.

It is important to give the MAYA_PLUG_IN_PATH whose security attribute is set to writable access for the current user in which Visual studio is running.
Apart from writing the custom export, it was interesting to debug it by attaching the Visual studio to Maya process. Below is the screenshot for one debugging for an instance.


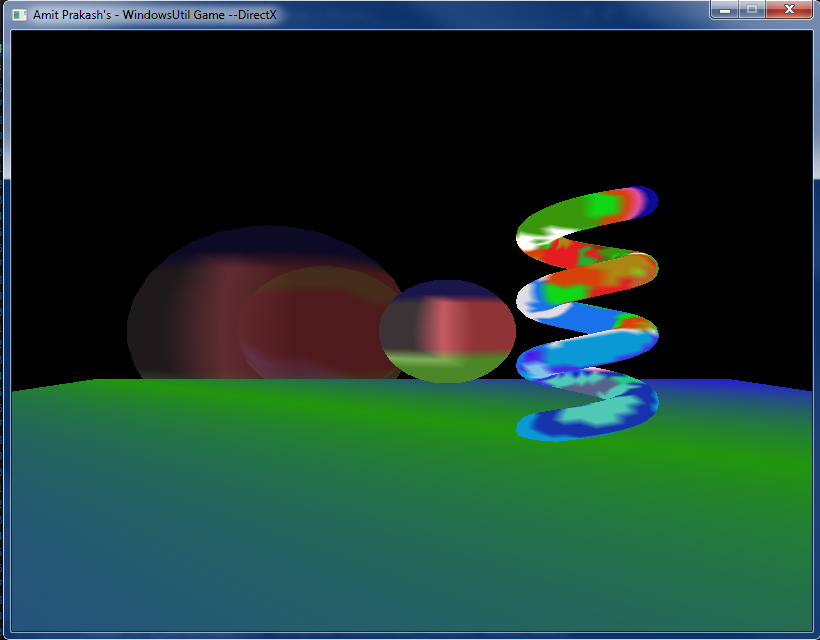
Another part of the assignment was to enable alpha blending to the meshes so that we can see the object through transparent object. For this we created a new shader in which we change the alpha blending to the color. For this, we created an effect file which give path to the new shader paths. Moreover, we introduced render state in the effect file itself so that we can change the render state of the device for each object.

I chose a simple format to add the render states rather than a table. The reason for this as we will have separate files for each effect and currently there is no other information apart path and render states, I chose the simplest way.
Moreover, as there is only four bool values to set the different render states. The good way is to store is to toggle the bits of a byte to store these values. The reason for this way is that it takes very (a byte against four bools) less space on the files; thus writing less and less reading from the file. I created an enum to define each bit as distinct render state as below. After reading the effect file render states values, I used the bits of a byte to store these values. In the same way, I read the render state and used it to change the device render states while setting/binding the effects.


Each of the effect file contains its own render state. Below is the render state in the effect file for an opaque object and an transparent object. First of the effect file is for Transparent object; in transparent object alpha blending will be on but depth writing will be disabled. The reason for disabling is to include the effect the of the objects from back to the front. This is the reason why we need to render objects from back to front so that the front objects color can have blended effect from the objects behind it. Render state for transparent effect file will be as below:
1. Alpha Transparency - True - 0000 0001 (1<<0)
2. Depth Testing - True - 0000 0010 (1<<1)
3. Depth Writing - False - 0000 0000 (1<<2)
4. Face Culling - True - 0000 1000 (1<<3)
Render State - 0000 1011 - 11
On the other hand for the opaque object render state will have only alpha transparency disabled. For the opaque object, alpha is not required as we need transparency.
1. Alpha Transparency - False - 0000 0000 (1<<0)
2. Depth Testing - True - 0000 0010 (1<<1)
3. Depth Writing - True - 0000 0100 (1<<2)
4. Face Culling - True - 0000 1000 (1<<3)
Render State - 0000 1110 - 14

Alpha transparency works on the value of the fourth channel of the RGBA channel - alpha channel. The value of alpha channel decides the transparency - '0' for invisible and '1' for opaque. For an instance, In DirectX, the final color of the for the ALPHA Transparency is calculated using:
Final Color = ObjectColor * SourceBlendFactor + PixelColor * DestinationBlendFactor
where the different effect can be achieved using various SourceBlendFactor and DestinationBlendFactor - these values are pre-defined in DirectX. Currently, we are using:
D3DBLEND_SRCALPHA - (As, As, As, As) - from Source object
D3DBLEND_INVSRCALPHA - (1-As, 1-As, 1-As, 1-As) - from destination object
This assignment was fairly easy and it didn't took long time. Implementation hardly took 2-3 hours. Although, I caught up in one bug. Whenever I was loading the Maya files having high number of triangles, the mesh wasn't displaying properly. It ook me more than an hour to find the bug as other Maya meshes were rendering correctly - cubes and plane. This was happening due to small but blunder mistake - when I was reading the human readable mesh file, I was casting lua_number for triangle indices to uint8_t and storing it to uint32_t. It is fine earlier as there was hardly 10-12 triangles. But when the mesh files coming from Maya having more than 255 vertices was creating the problem. Moreover, I spent more time on the write-up mostly like two hour. With almost 5-6 hours of work, I got the result as expected.
